|
Below is an overview for the installation of the AquaFloor wetroom system.
Comprehensive fitting instructions and detailed instructional video are also available from Livinghouse.co.uk
Quick fitting guide
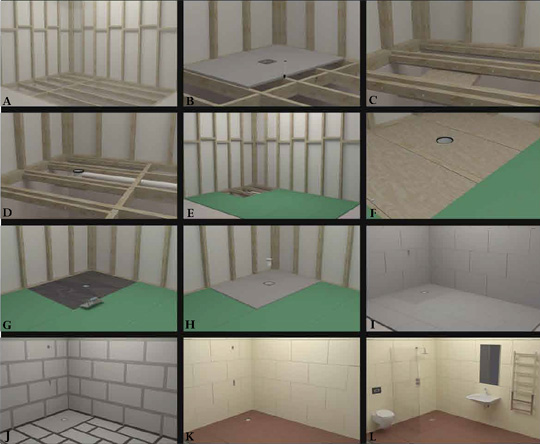
1. Mark the wet room tray position on the joists (image B).
2. Install sub floor and waste supports (image C).
3. Install the waste body and pipework for the tanking tray (image D).
4. Install a chipboard sub floor leaving the marked hidden tray area clear (image E).
5. Install a sub-floor to support the pre-formed tray flush with the top of the joists (image F).
6. Using a quality flexible tile adhesive glue down the tray (image G).
7. Screw the waste into the drain body and fit the odour barrier (image H).
8. Using a quality flexible tile adhesive install the tanking boards remaining bathroom floor area (image I).
9. Prime the floor 75mm either side of all joints on the floor including between the wall and floor and between
the tanking boards and wetroom tray.
10. Allow primer to dry, then apply the tanking tape to all primed joints including between wall and floor (image J).
11. Tile the tanked floor using a good quality tile adhesive (image K).
|
